Forms
The Forms page is where you create, publish, and manage custom forms — contact forms, surveys, registrations, and more. Build with a drag-and-drop editor, style the public page, save as Draft or Publish, share the public link, and review submissions.
To open this page, navigate to:
Navigation: Dashboard → FormsPlan Limits
- Free — up to 3 forms. Submissions are still collected without a hard stop; you can clearly view the 50 newest per form. Older entries stay locked until you upgrade.
- Creator and Growth — unlimited forms and full submission visibility
Forms beyond the Free allowance after a downgrade can show a Plan locked badge. Locked forms stay in your list but cannot be used in new Link in Bio or automation placements until you upgrade or stay within the Free limit.
My Forms List
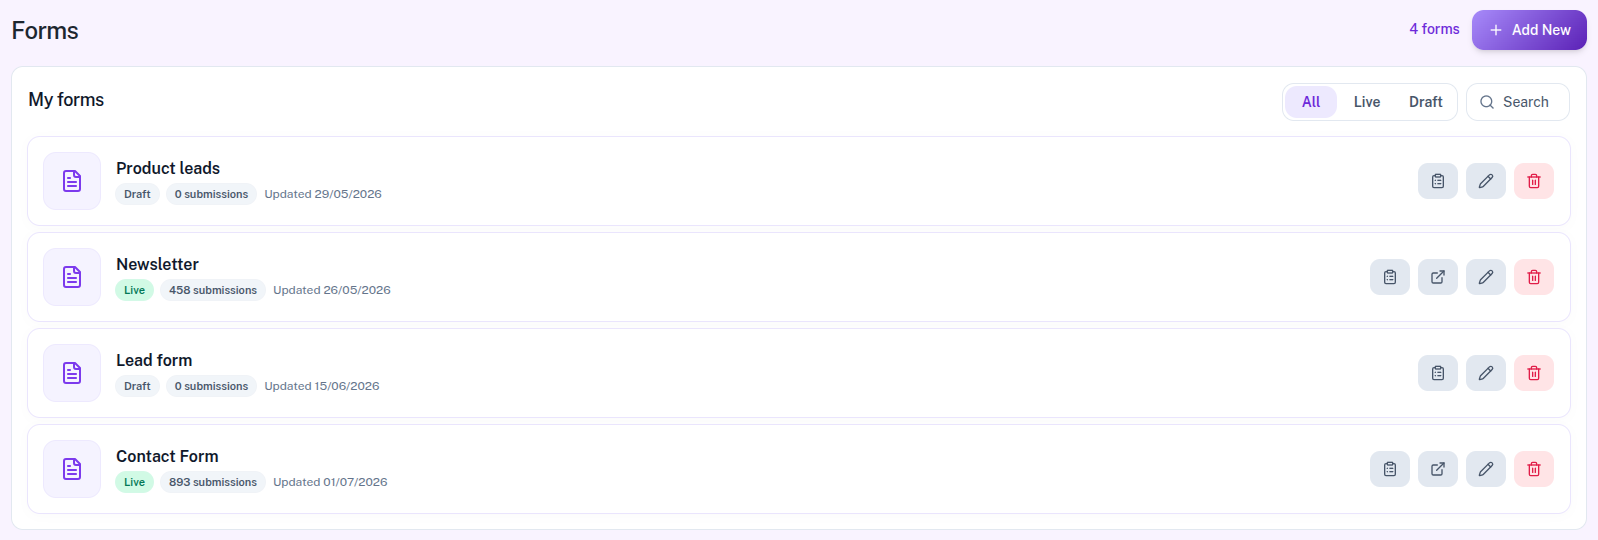
The dashboard card is titled My forms. Each row shows the internal form name (not the public title), a Published or Draft badge, submission count, optional Created by (delegates), and last updated date.
- Filters: All, Published, Draft
- Search by title or name
- Add New — opens the template picker; disabled when you have reached the form limit
- Actions: submissions (ClipboardList), open public form (Published only), edit, delete
You cannot delete a form that is used in Link in Bio. Delegates can delete only when the owner enabled Allow Delete.
Choosing a Template
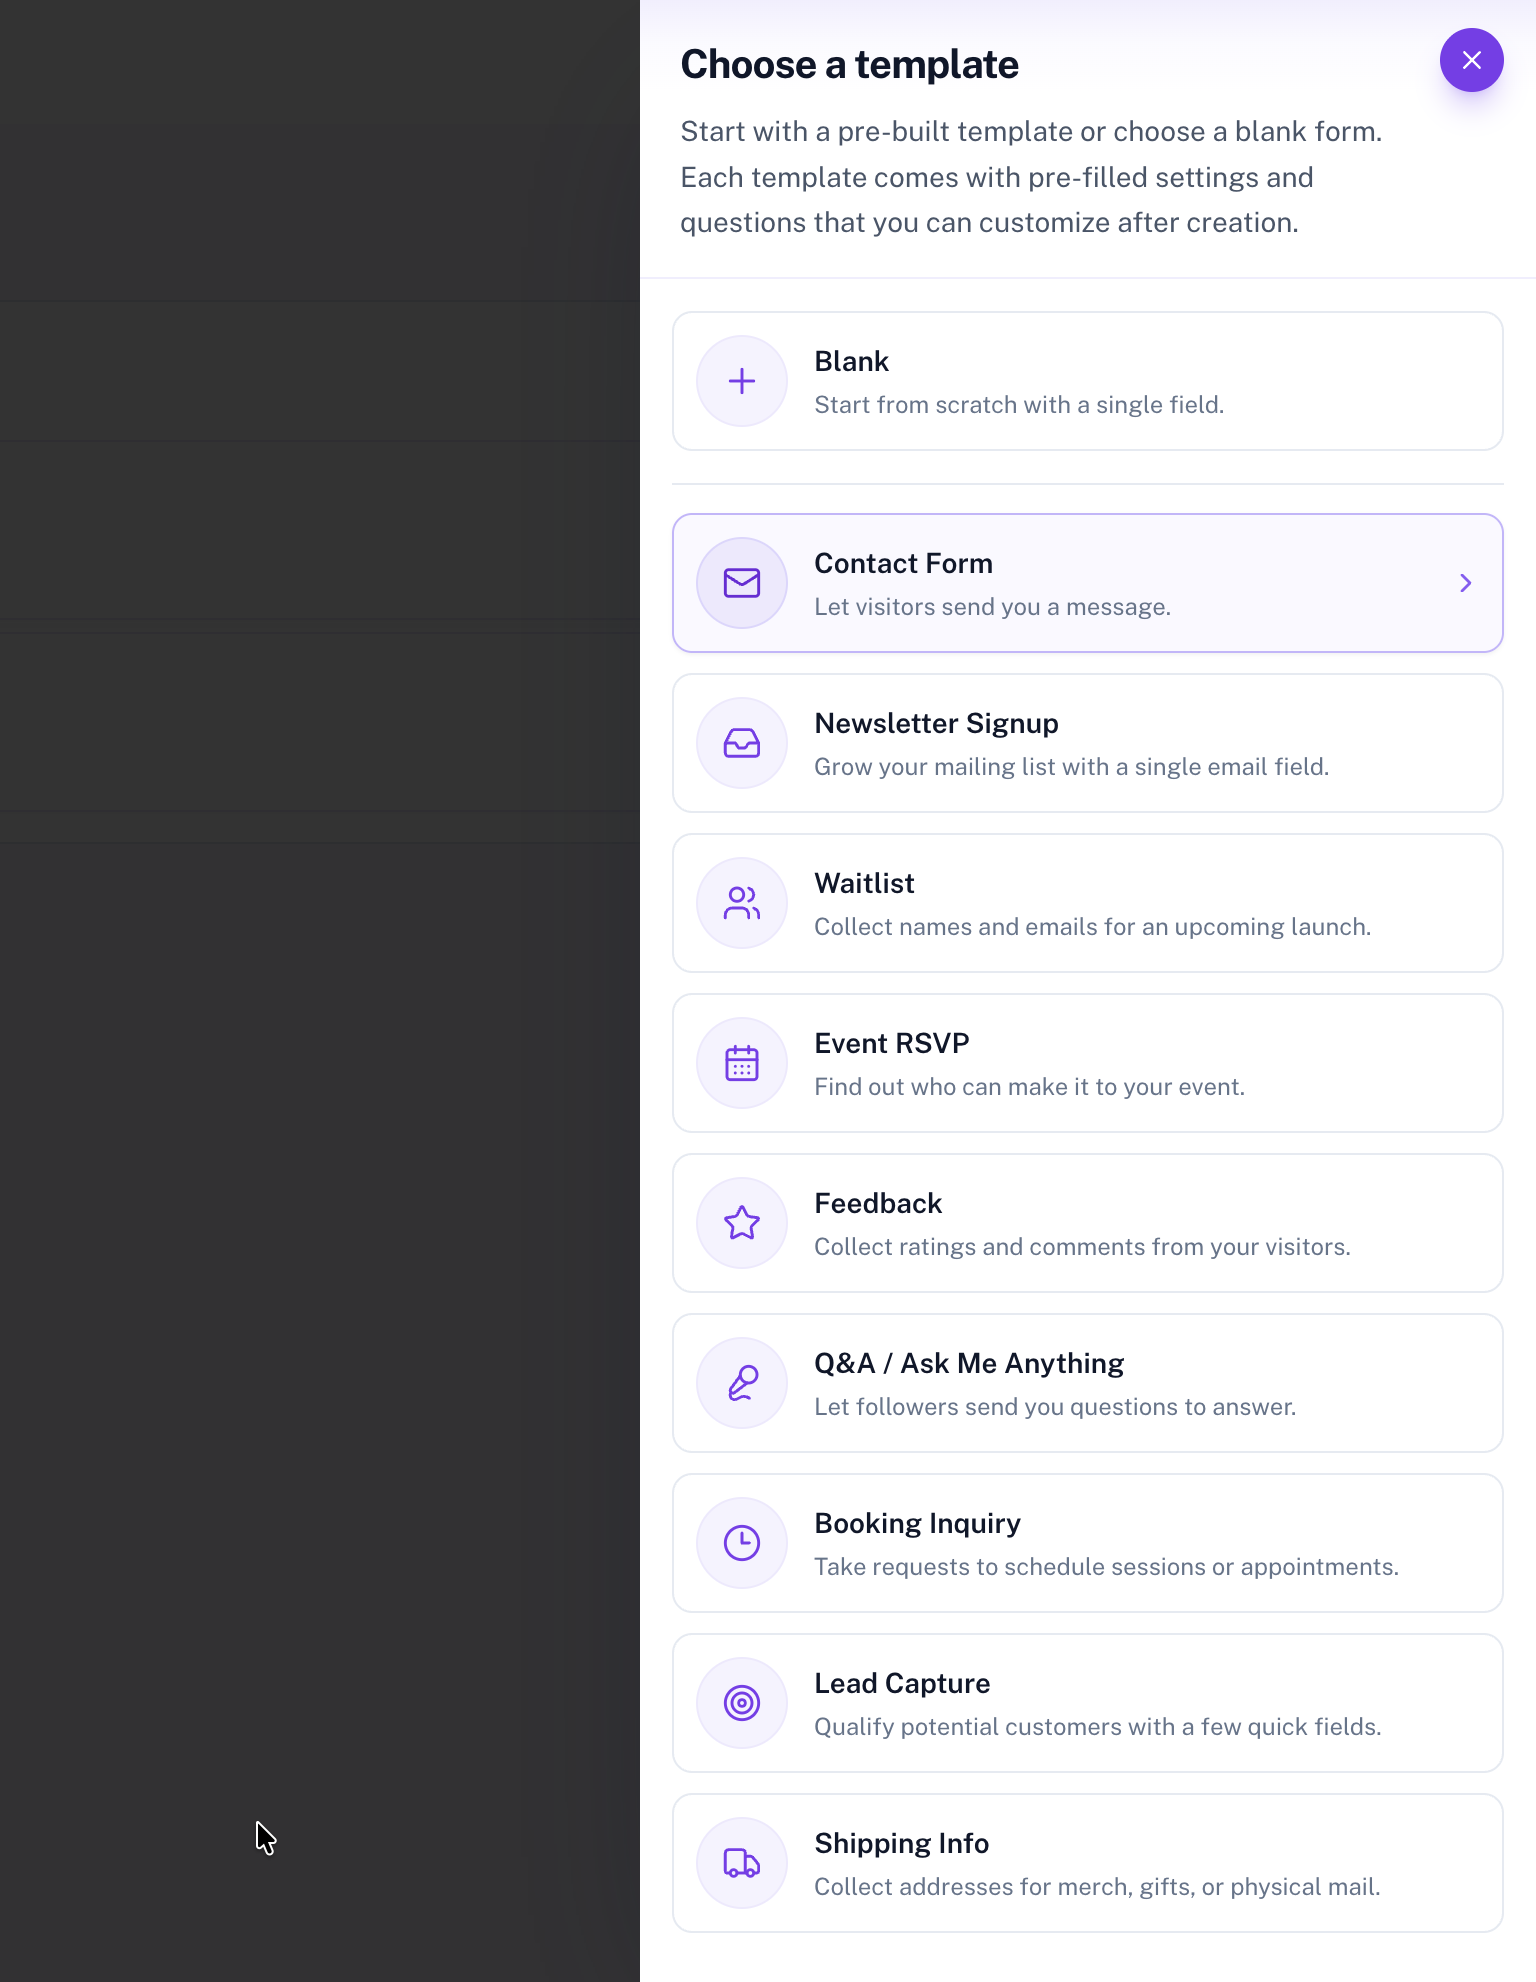
Click Add New to open the Choose a template panel on the right. Pick a preset to start with pre-filled settings and questions, or choose Blank to start from scratch. After you select a template, the form builder opens with those defaults — you can change anything before publishing.
Templates are a creation-time convenience only. Once the form is saved, there is no record of which template you used; editing works the same for every form.
- Blank — start from scratch with a single field
- Contact Form — name, email, and message
- Newsletter Signup — email only
- Waitlist — name and email for a launch list
- Event RSVP — attendance with Yes / No / Maybe
- Feedback — rating and optional comments
- Q&A / Ask Me Anything — questions from your audience
- Booking Inquiry — session requests with a preferred date
- Lead Capture — qualify leads with company and help details
- Shipping Info — collect addresses for fulfillment
Building Your Form
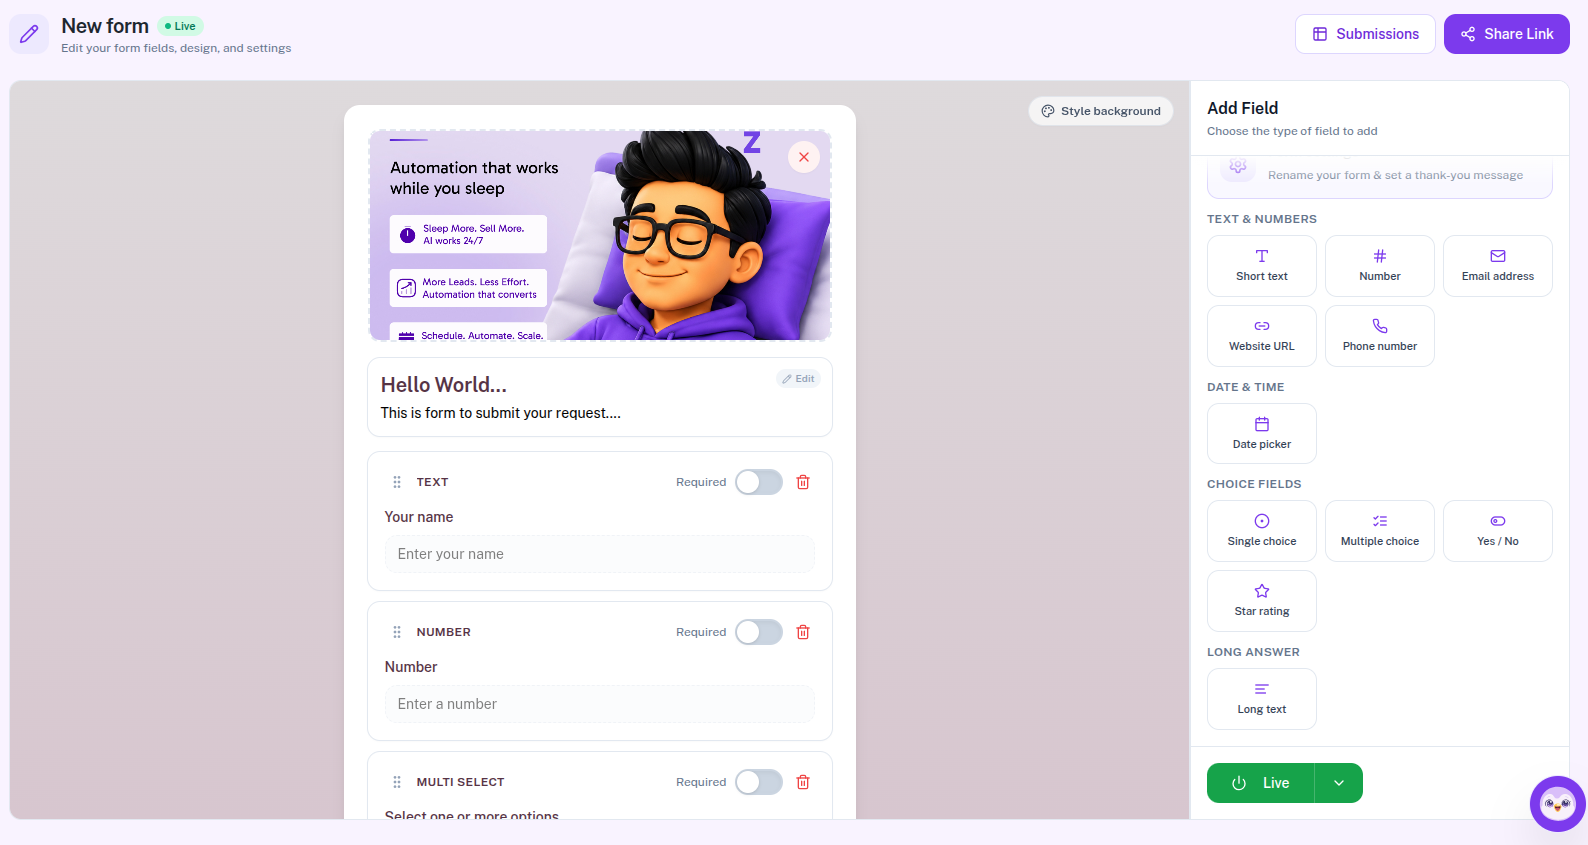
After you pick a template (or edit an existing form), use the drag-and-drop builder. You need a form name, a public title, and at least one enabled field to save.
- Edit the public form title and description on the canvas.
- Optionally click Add a cover photo (Media Library) at the top.
- From Add Field in the sidebar, pick field types such as Short text, Number, Email address, Website URL, Phone number, Date picker, Long text, Single choice, Multiple choice, Yes / No, or Star rating.
- Configure each field (question label, Required field, placeholders, options, ranges) and drag fields to reorder.
- Customize the Submit button label on the canvas.
Draft, Publish & Share Link
The save control is a split button: Draft (save without publishing; form is not public) or Publish / Update (publish and enable the public link, or save changes to an already published form). Only Published forms are available at the public URL /form/{id}.
- On edit, use Share Link to copy the URL, open share guides, or show a QR code — disabled while the form is Draft
- On the list, the open-in-new-tab action appears for Published forms only
- Saving as Draft again unpublishes a Published form
- Forms can also be linked from Link in Bio
Styling Your Form
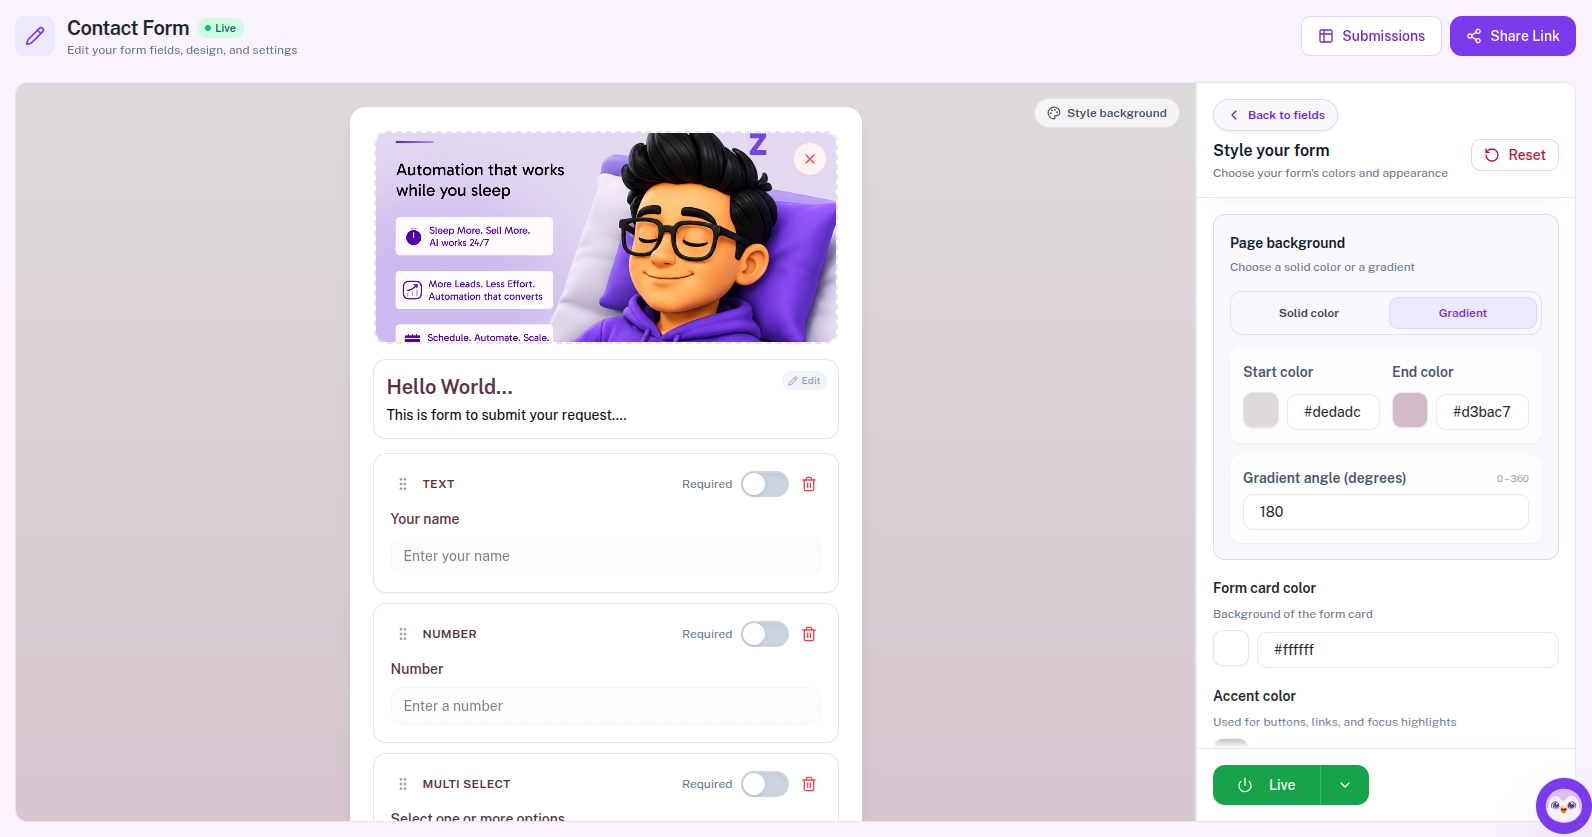
In the right sidebar, open Style your form:
- Page background — solid color or gradient (start, end, angle)
- Form card color
- Accent color — buttons, links, and focus highlights
- Text color
- Reset — restore default styling
Form Settings
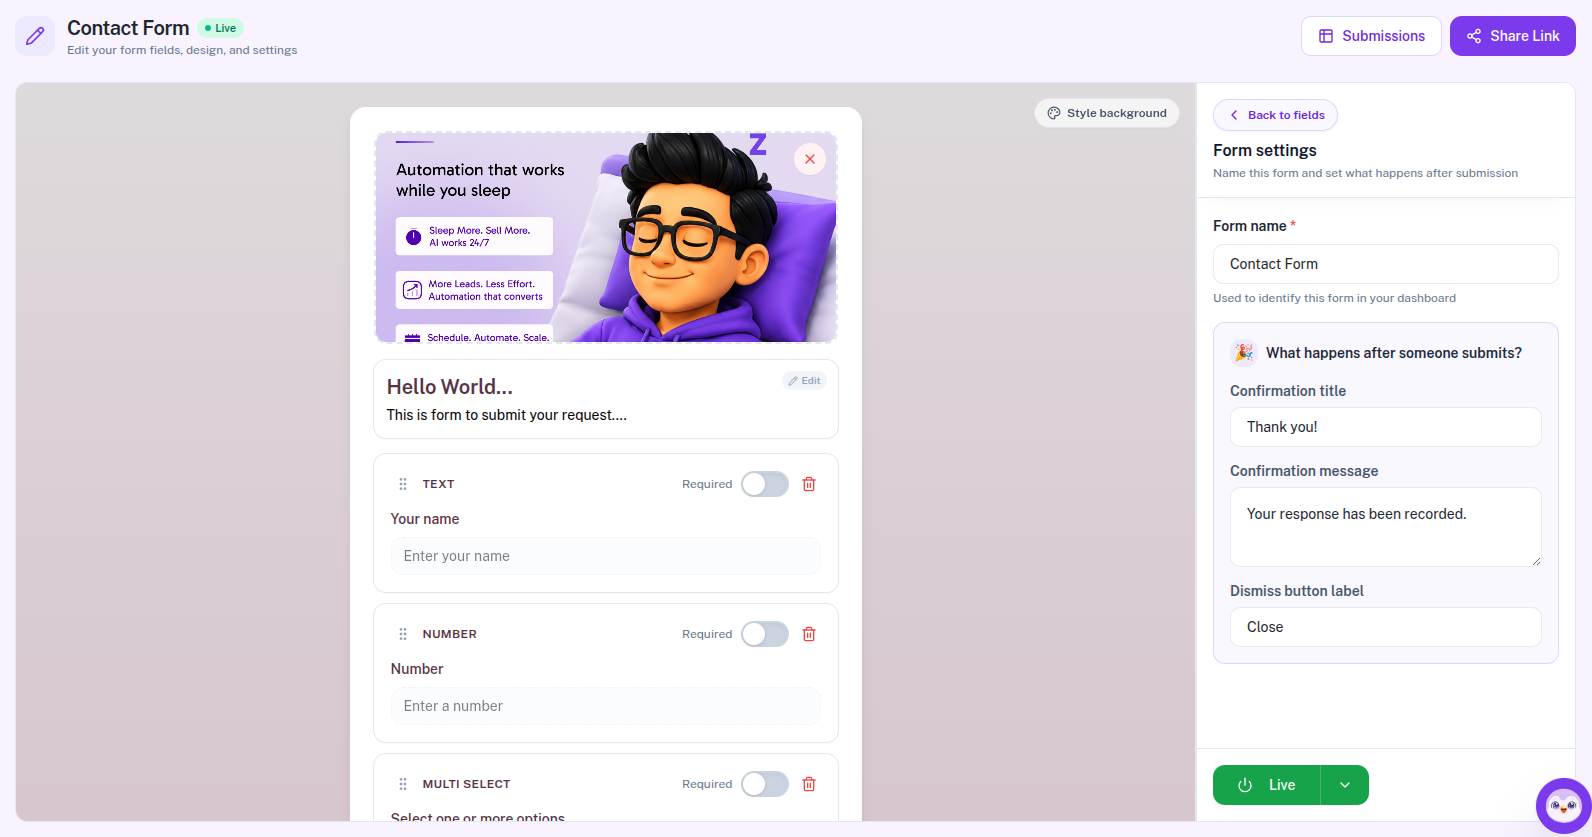
Under Form settings in the sidebar:
- Form name — internal label in My forms
- Confirmation title — shown after submit (for example “Thank you!”)
- Confirmation message
- Dismiss button label — closes the confirmation screen
Viewing Submissions
Open submissions from any form (Published or Draft) via the list action or Submissions on the edit screen. The page is titled Form submissions and lists entries newest first.

- Table columns: No, Submitted, up to three answer fields, Action
- Refresh and Edit form in the header
- On Free plan, entries beyond the 50 newest appear locked; upgrade (or ask the owner in delegated mode) to unlock them
Submission Details
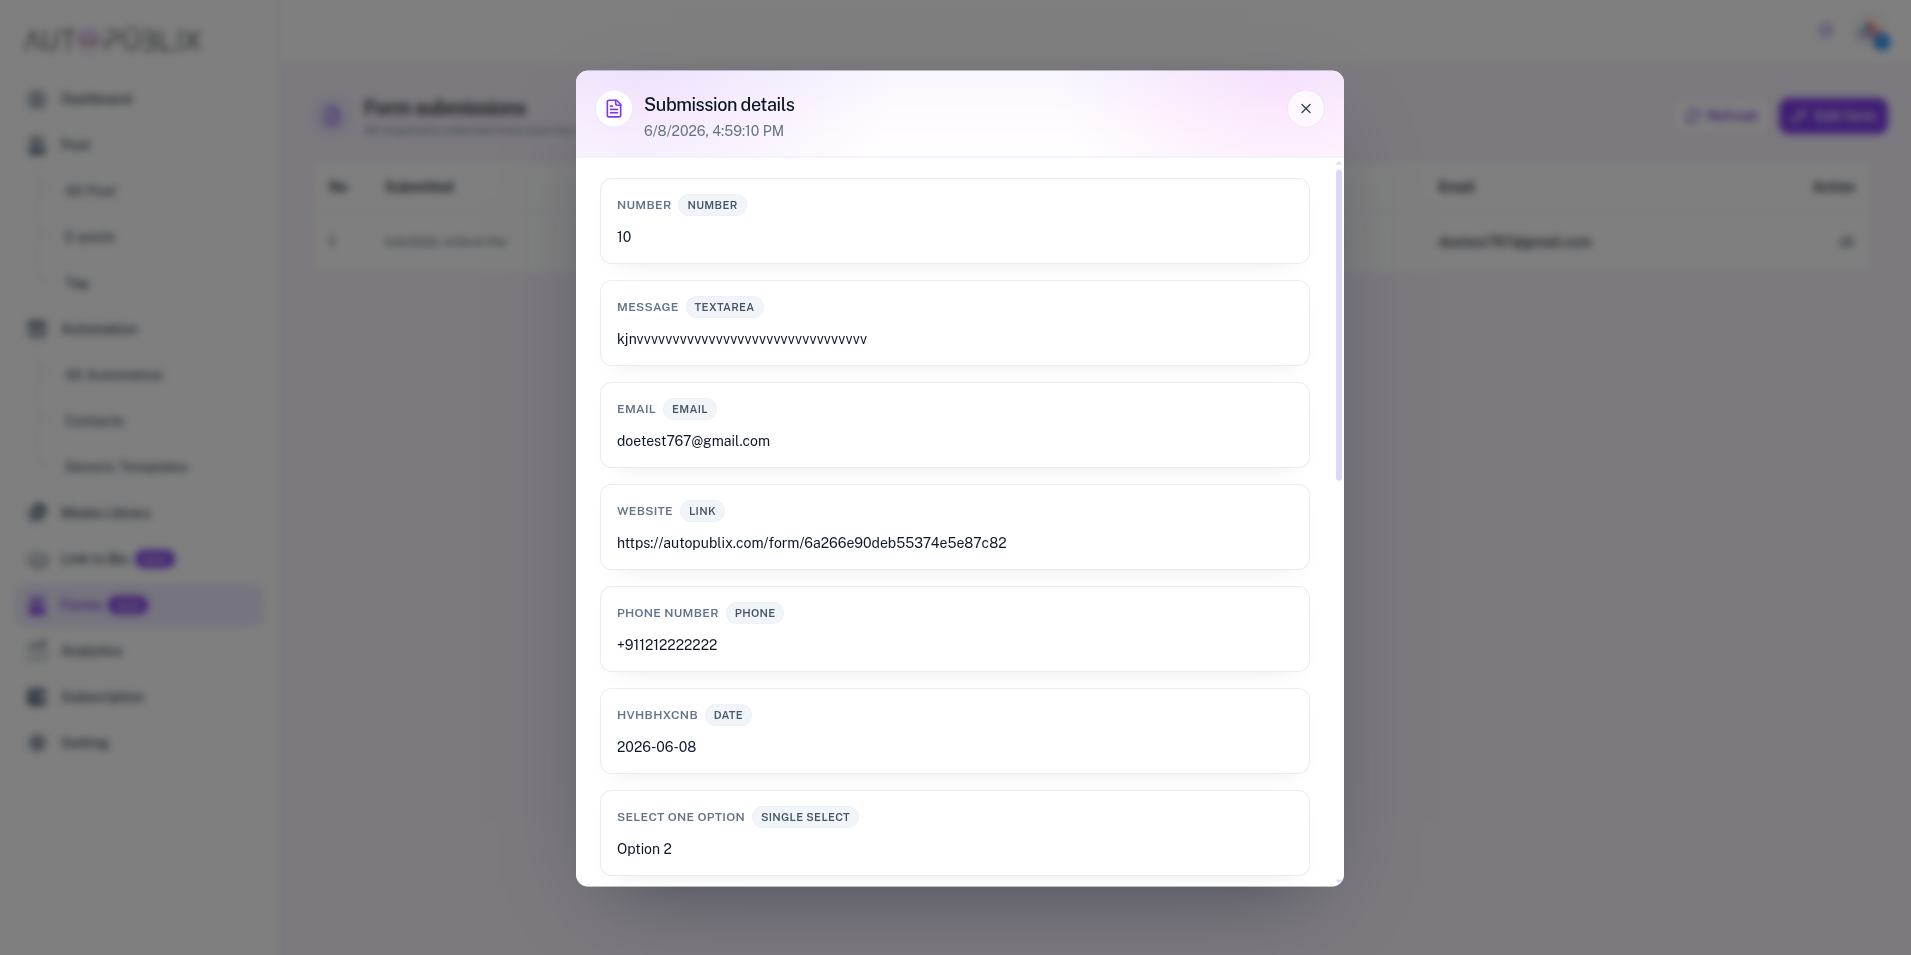
Click the Eye (View) action on a row to open Submission details. Each answer shows the field label and a type badge such as Text, Email, Date, or Single select. Locked Free-plan rows use a Lock action instead of View until you upgrade.