

E-posts
The E-posts feature automates product posting from connected e-commerce stores such as Shopify or WooCommerce (Growth plan). Create campaigns that pull products from your catalog and publish scheduled social posts with optional AI-generated captions.
To open this page, navigate to:
Navigation: Dashboard → Post → E-postsWhat You Can Do on This Page
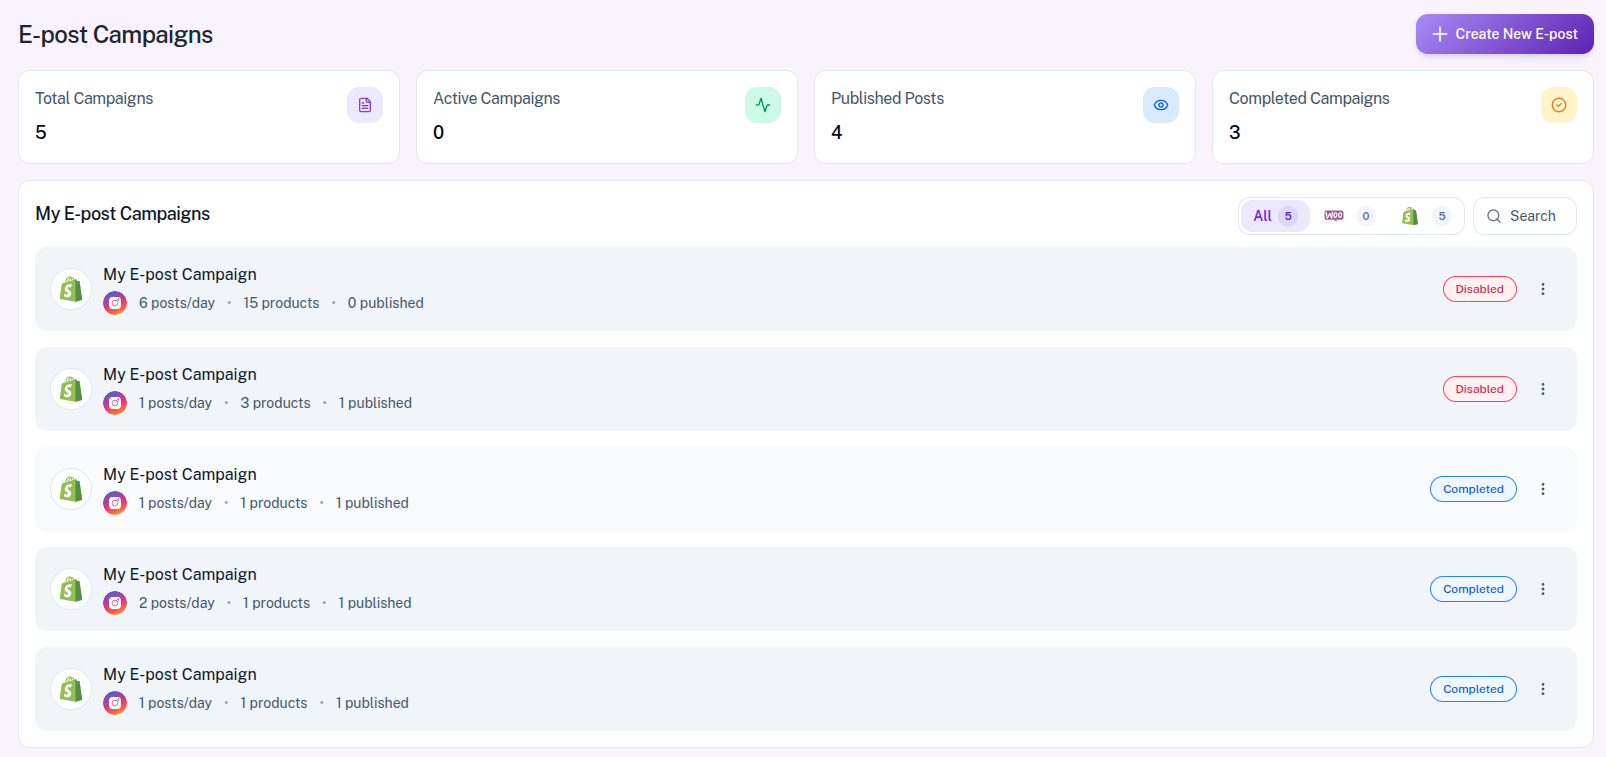
The E-post Campaigns dashboard gives you a high-level overview of all your automated product posting efforts. At the top, you will see key metrics including your Total Campaigns, Active Campaigns currently running, the total number of Published Posts, and Completed Campaigns. Below the metrics, a comprehensive list displays all your campaigns with details like the store icon (Shopify or WooCommerce), campaign name, posting frequency, product count, and published count.
Each campaign also features a status badge (such as Disabled or Completed) so you can instantly see its current state. You can manage individual campaigns using the three-dots menu on the right side of each row. To quickly locate specific campaigns, use the filter tabs or the Search bar. When you are ready to set up a new automation, click the purple + Create New E-post button at the top right.
E-posts require the Growth plan and a connected store. If your plan no longer includes Growth entitlements, campaigns can become plan-locked and stop publishing until you upgrade again.
Creating an E-post Campaign
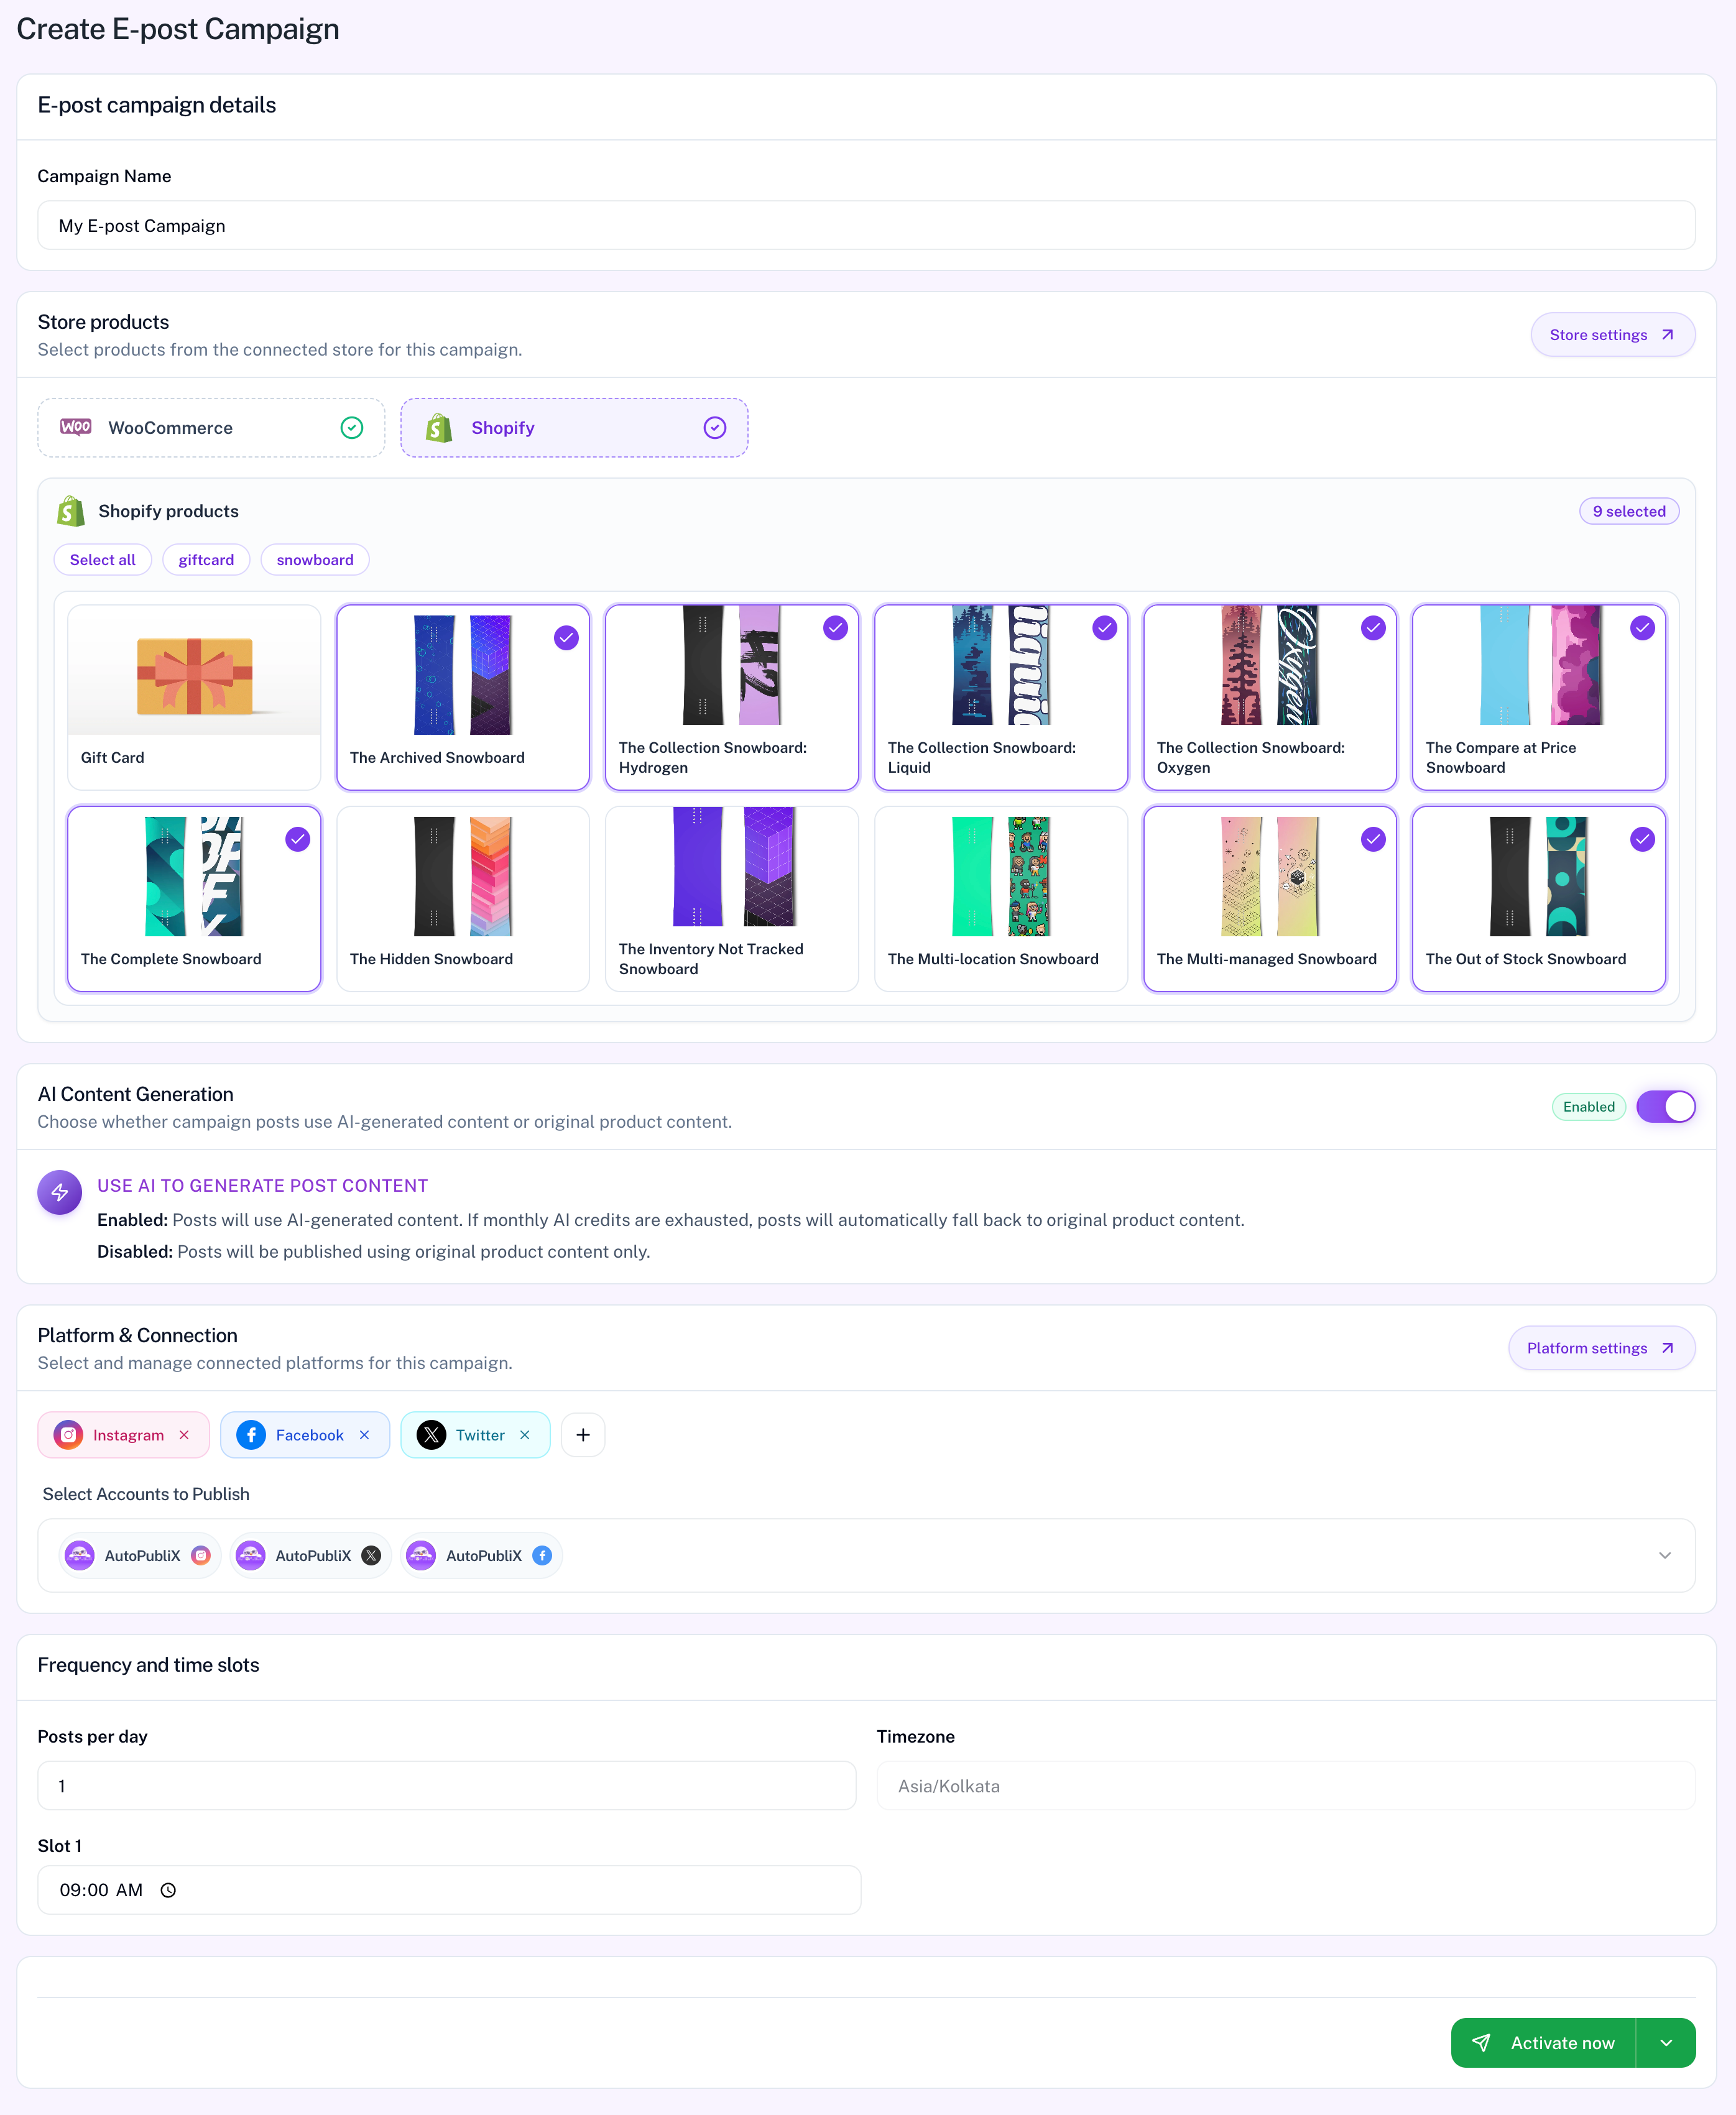
Click + Create New E-post, then fill in each section on the form:
- E-post campaign details — enter a clear campaign name so you can find it later on the dashboard.
- Store products — select a connected store (WooCommerce or Shopify). Use Store settings if you still need to connect a store. After the store is selected, choose the products you want this campaign to post — at least one product is required for the E-post to run. You can use filters (or Select all) to pick products faster; the badge shows how many are selected.
- AI Content Generation — choose whether each product post uses AI-written captions or the original product content from your store.
- Platform & Connection — choose where to publish (Instagram, Facebook, Twitter/X, and LinkedIn), then pick the accounts under Select Accounts to Publish. Use Platform settings to manage connections.
- Frequency and time slots — set posts per day, timezone, and one or more daily time slots (for example 09:00 AM).
How AI Content Generation works: Use the toggle in this section to turn it Enabled or Disabled.
- Enabled — when a post is due, AutoPubliX uses AI to generate engaging caption and hashtag content for that product. This consumes monthly AI credits.
- If your monthly AI credits run out, the campaign does not stop — posts automatically fall back to the original product title/description from your store so publishing continues.
- Disabled — posts always use original product content only (no AI credits used).
When everything looks right, click Activate now to start the campaign. You can also use the dropdown next to that button for other save or schedule options if available.
Viewing an E-post Campaign
Open any campaign from the list with the three-dots menu → View to see how it is running and what has already been published.
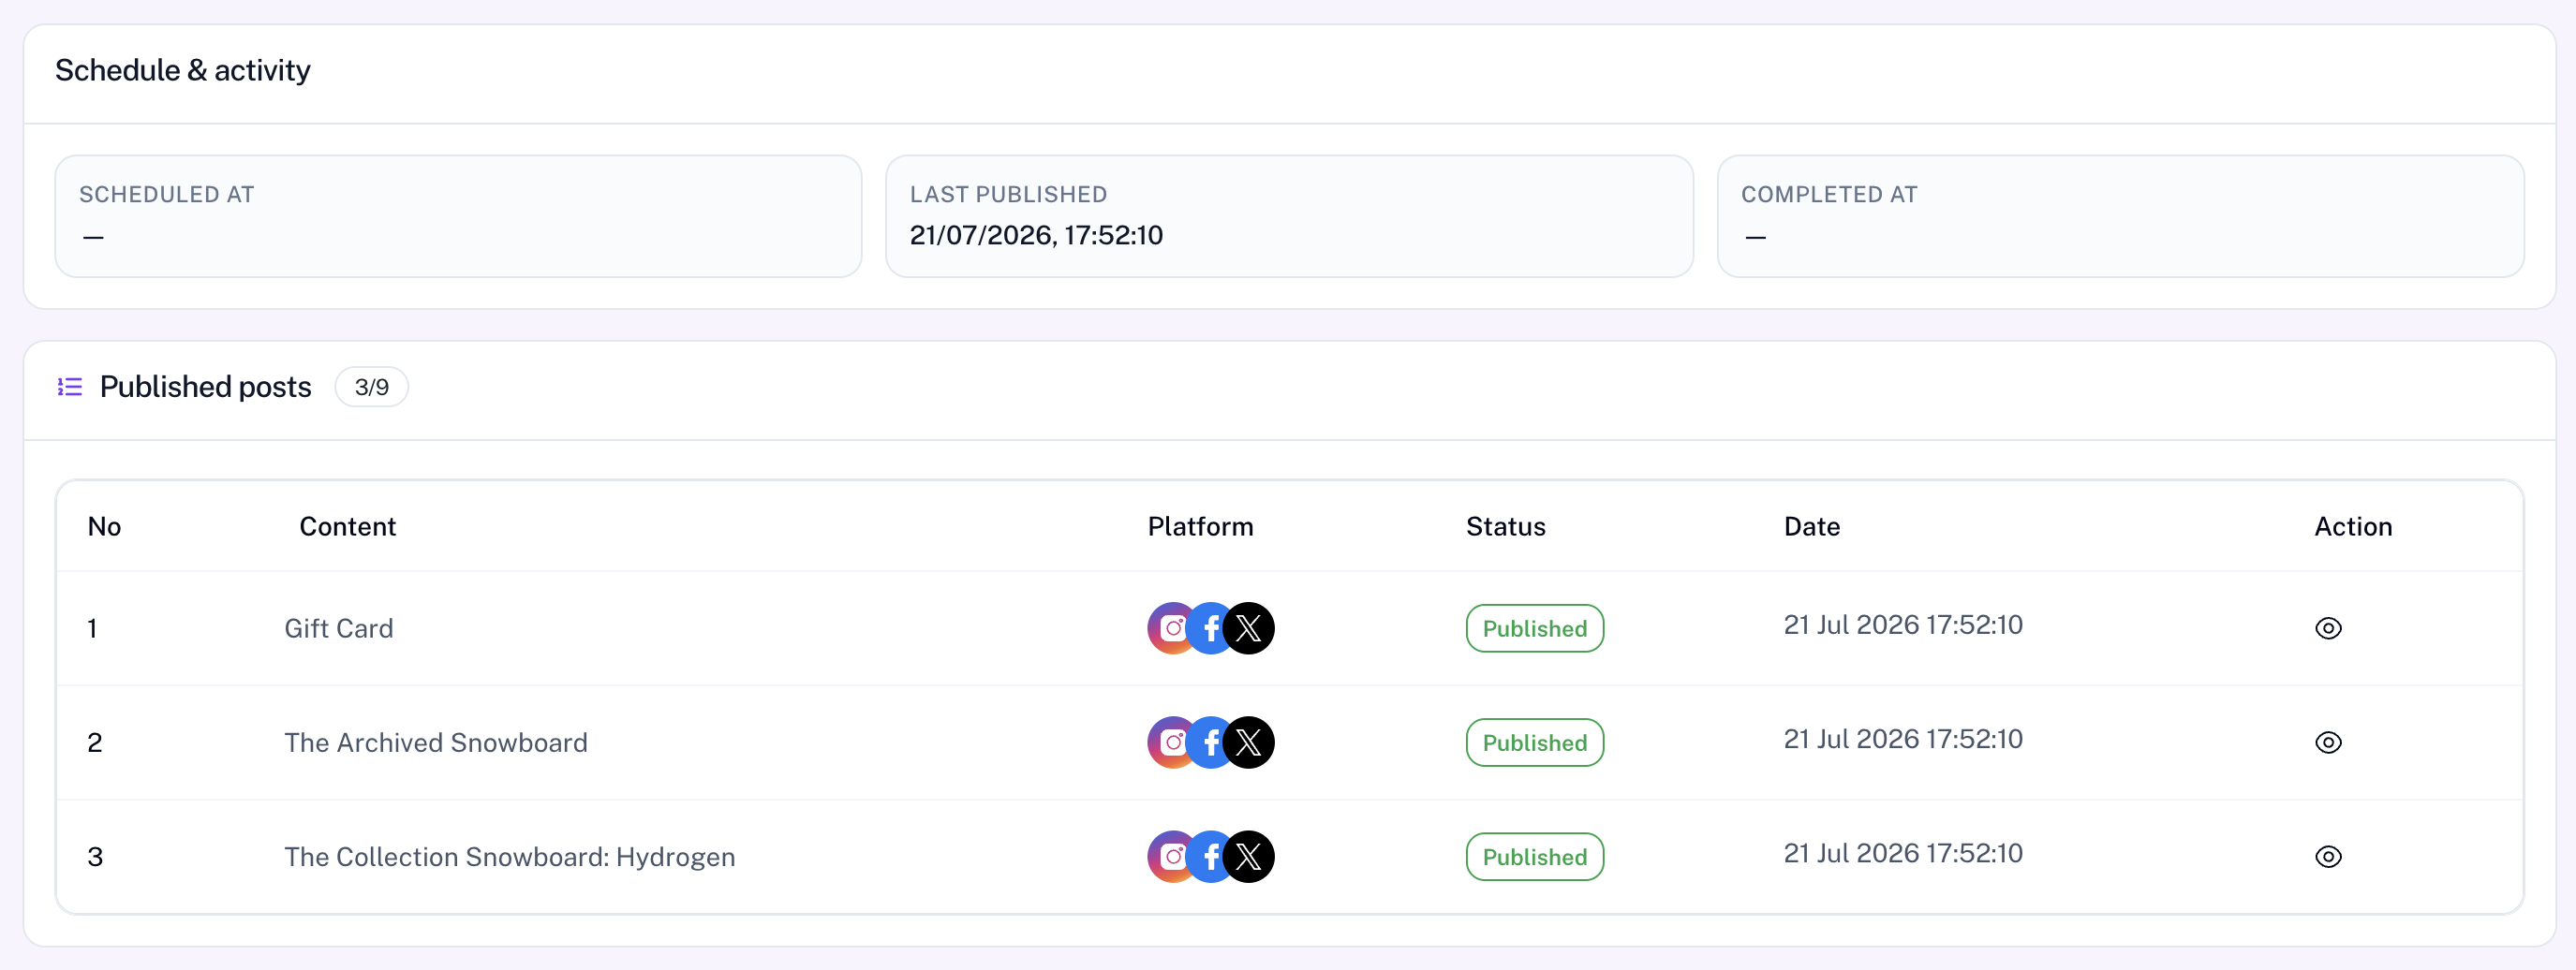
- Schedule & activity (top) — quick status of timing: when the campaign is Scheduled at, when it was Last published, and when it was Completed at. A dash (—) means that event has not happened yet.
- Published posts (bottom) — a table of posts this campaign has already sent. The badge (for example 3/9) shows published count vs selected products. Each row lists content, platforms, status, date, and an eye icon to open that post.
Use this page to track progress without editing the campaign. From here you can also click Edit at the top if the campaign is not completed.
Editing an E-post Campaign
You can update a campaign anytime unless it is already Completed.
- On the E-posts list, open the three-dots menu on the campaign row and choose Edit.
- Or open the campaign with View, then click Edit at the top.
The edit form matches create — you can change the name, stores, AI setting, platforms and accounts, and schedule. Save your changes to apply them. Completed campaigns cannot be edited.
Deleting an E-post Campaign
To remove a campaign you no longer need:
- On the E-posts list, open the three-dots menu on the campaign row.
- Choose Delete, then confirm in the popup.